The Best Fluffy Pancakes recipe you will fall in love with. Full of tips and tricks to help you make the best pancakes.
Vanilla Sponge Cake Recipe That’s Soft, Fluffy, and Bakes Like a Dream
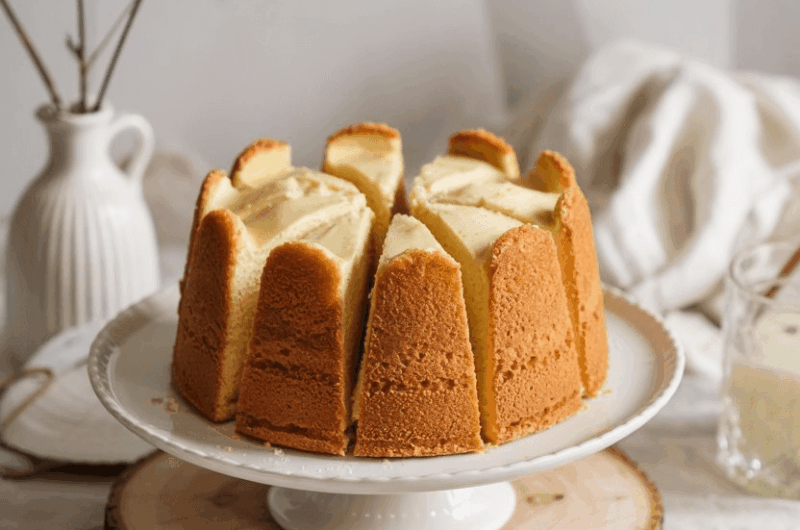
There’s something about a light, airy vanilla sponge cake that feels like a warm hug. It’s the kind of cake that brings everyone to the table, whether you’re celebrating a birthday, sharing afternoon tea, or just baking to lift your spirits.
The aroma alone is enough to make your kitchen feel cozier.This recipe makes a classic vanilla sponge cake that’s delicate, fluffy, and not too sweet.
Whether you’re new to baking or have tried sponge cakes before with mixed results, this one has your back. You’ll learn not just how to bake it, but how to get that perfect golden crust and cloud-like crumb.
Recipe Snapshot
| Category | Details |
| Yield | 1 8-inch round cake |
| Serving Size | 1 slice (1/8 of cake) |
| Prep Time | 25 minutes |
| Bake Time | 30–35 minutes |
| Total Time | 1 hour |
| Calories per Serving | ~220 kcal |
| Primary Cooking Method | Baking |
| Cooling Time | 30 minutes |
| Occasion | Everyday, Birthdays |
| Diet Type | Vegetarian |
| Storage Note | Keep in airtight container for 3 days |
Calories are approximate and may vary depending on exact ingredients used.
Vanilla Sponge Cake
Course: DessertCuisine: EuropeanDifficulty: IntermediateServings
1
slicePrep time
25
minutesBake Time
30
minutesCalories
220
kcalThis vanilla sponge cake recipe is a go-to base cake loved for its pillowy crumb and subtle sweetness. Unlike pound cakes or butter cakes, it relies entirely on whipped eggs for its height and texture—no baking powder needed.
That makes the technique especially important, and the result incredibly rewarding.
The balance of sugar, eggs, and flour in this recipe creates a cake that is light but not dry, fluffy but not crumbly.
It’s versatile enough for birthdays, tea parties, trifles, or just a quiet Sunday afternoon. Whether you enjoy it plain or layered with whipped cream and fruit, this cake is a must-have in your baking rotation.
Ingredients
4 large eggs (room temperature)
3/4 cup (150g) granulated sugar
1 cup (120g) cake flour (or substitute below)
1/4 cup (60ml) whole milk (lukewarm)
1/4 cup (60ml) neutral oil (like canola or vegetable)
1 tsp vanilla extract
1/4 tsp salt
- Optional
1/4 tsp cream of tartar (for egg stability)
- Cake Flour Substitute:
Use 1 cup all-purpose flour minus 2 tbsp, then add 2 tbsp cornstarch. Sift well.
Directions
- Preheat Oven and Prepare the Pan
Start by preheating your oven to 350°F (175°C). Grease the bottom only of an 8-inch round cake pan and line it with parchment paper. Avoid greasing the sides; this helps the cake rise higher by giving the batter something to cling to. - Whip Eggs and Sugar to Ribbon Stage
Place 4 large eggs in a large metal or glass mixing bowl. Add 3/4 cup sugar and 1/4 tsp cream of tartar if using. Use a hand or stand mixer to beat the eggs and sugar on high speed for 8–10 minutes.
You’ll know you’re done when the mixture turns very pale, thick, and forms ribbons when you lift the beater and let it fall. This process traps air that will act as a natural leavening agent. - Sift and Fold in the Flour
In a separate bowl, sift together 1 cup cake flour and 1/4 tsp salt. Sift once more directly over the whipped egg mixture. Do this in three batches to avoid clumping.
Gently fold the flour into the egg mixture after each addition using a spatula. Cut through the center and sweep around the edges. This keeps the air bubbles intact. Be patient and avoid overmixing. - Lighten the Milk and Oil Mixture
Warm 1/4 cup milk slightly (just above room temp) and combine with 1/4 cup neutral oil and 1 tsp vanilla extract.
Take a scoop of the batter (around 1/2 cup) and mix it into the milk-oil mixture. This tempers the liquid and prevents deflation.
Now gently fold this lightened mixture back into the main batter. It should take about 15 folds—not too many! - Transfer to Pan and Bake
Pour the batter into the prepared cake pan. Use a spatula to gently level the top. Tap the pan lightly on the counter once or twice to release any large air bubbles.
Bake for 30 to 35 minutes, or until the top is golden and a skewer inserted in the center comes out clean. Avoid opening the oven door during the first 25 minutes to prevent the cake from sinking. - Cool Gradually to Prevent Collapse
Once baked, let the cake rest in the pan for about 5–10 minutes. Then run a knife around the sides to loosen and turn the cake out onto a wire rack.
Peel off the parchment paper and allow it to cool completely—at least 30 minutes—before slicing or decorating.
Extra Tips for Perfect Results
- Room temperature eggs whip better—take them out 30 minutes before baking.
- Do not overfold after adding flour or liquids. Overmixing = flat cake.
- If your oven runs hot, check at 28 minutes.
- Use a scale for flour and sugar for the best consistency.
- Let the cake cool completely before decorating or slicing.
Equipment You’ll Need
Keep things simple and ready to go. Here’s what to gather before you start:
- Electric mixer (hand or stand)
- Mixing bowls (preferably glass or metal)
- 8-inch round cake pan (2-inch depth)
- Fine mesh sieve or sifter
- Whisk
- Rubber spatula
- Kitchen scale (optional but recommended)
- Parchment paper
- Cooling rack
Make-Ahead Tips
Need to prep in advance? No problem. Here’s how to plan it out without losing freshness:
- You can bake the cake 1 day ahead and store it wrapped at room temperature.
- To freeze: Wrap cooled cake in cling film and foil. Freeze up to 2 months. Thaw at room temperature before serving.
- Avoid slicing until ready to serve to keep the cake moist.
How to Store Vanilla Sponge Cake Without Drying It Out
If you’re lucky enough to have leftovers, here’s how to keep them soft and springy:
- Store in an airtight container at room temperature for up to 3 days.
- If sliced, press a piece of wax paper against the cut edge to lock in moisture.
- Refrigeration is not necessary unless your room is very hot/humid.
Frequently Asked Questions About Vanilla Sponge Cake
Why did my sponge cake collapse in the middle?
This usually happens from underbaking or overmixing after adding flour. Always test doneness with a skewer and handle the batter gently.
Can I use all-purpose flour instead of cake flour?
Yes, but your cake may be slightly denser. For better results, use the AP flour + cornstarch substitute shared earlier.
Can I double this recipe for a layered cake?
Yes, double the ingredients and bake in two 8-inch pans. Check doneness at 28–30 minutes.
What frosting goes well with vanilla sponge cake?
Whipped cream, chocolate ganache, fruit preserves, or vanilla buttercream all work wonderfully.
Ingredient Tips: Choosing the Best Eggs, Oil, and Flour
What you use matters more than you think. Here’s how to level up your ingredients:
- Eggs: Fresh, large, and at room temp. Avoid cold eggs.
- Oil: Use a neutral oil like canola, sunflower, or vegetable—not olive oil.
- Flour: Cake flour gives the lightest crumb, but AP flour + cornstarch works too.
Serving Ideas for Vanilla Sponge Cake
Whether you’re making it simple or fancy, this cake adapts beautifully. Here are a few ways to serve it:
- With powdered sugar and berries for a light tea-time snack
- Frosted with whipped cream and topped with strawberries or peaches
- As a layered birthday cake with jam and buttercream
- Drizzled with chocolate sauce and chopped nuts
Why You’ll Love This Vanilla Sponge Cake
This cake is gentle, springy, and so versatile—it’s one of those recipes you’ll keep coming back to. You’ll love how easily it comes together with basic pantry ingredients, and once you master the folding and whipping, you’ll be baking like a pro.
From birthdays to quiet afternoons, this sponge cake adds joy to any table. So pull out your whisk and pan—it’s time to create something sweet and timeless.