The Best Fluffy Pancakes recipe you will fall in love with. Full of tips and tricks to help you make the best pancakes.
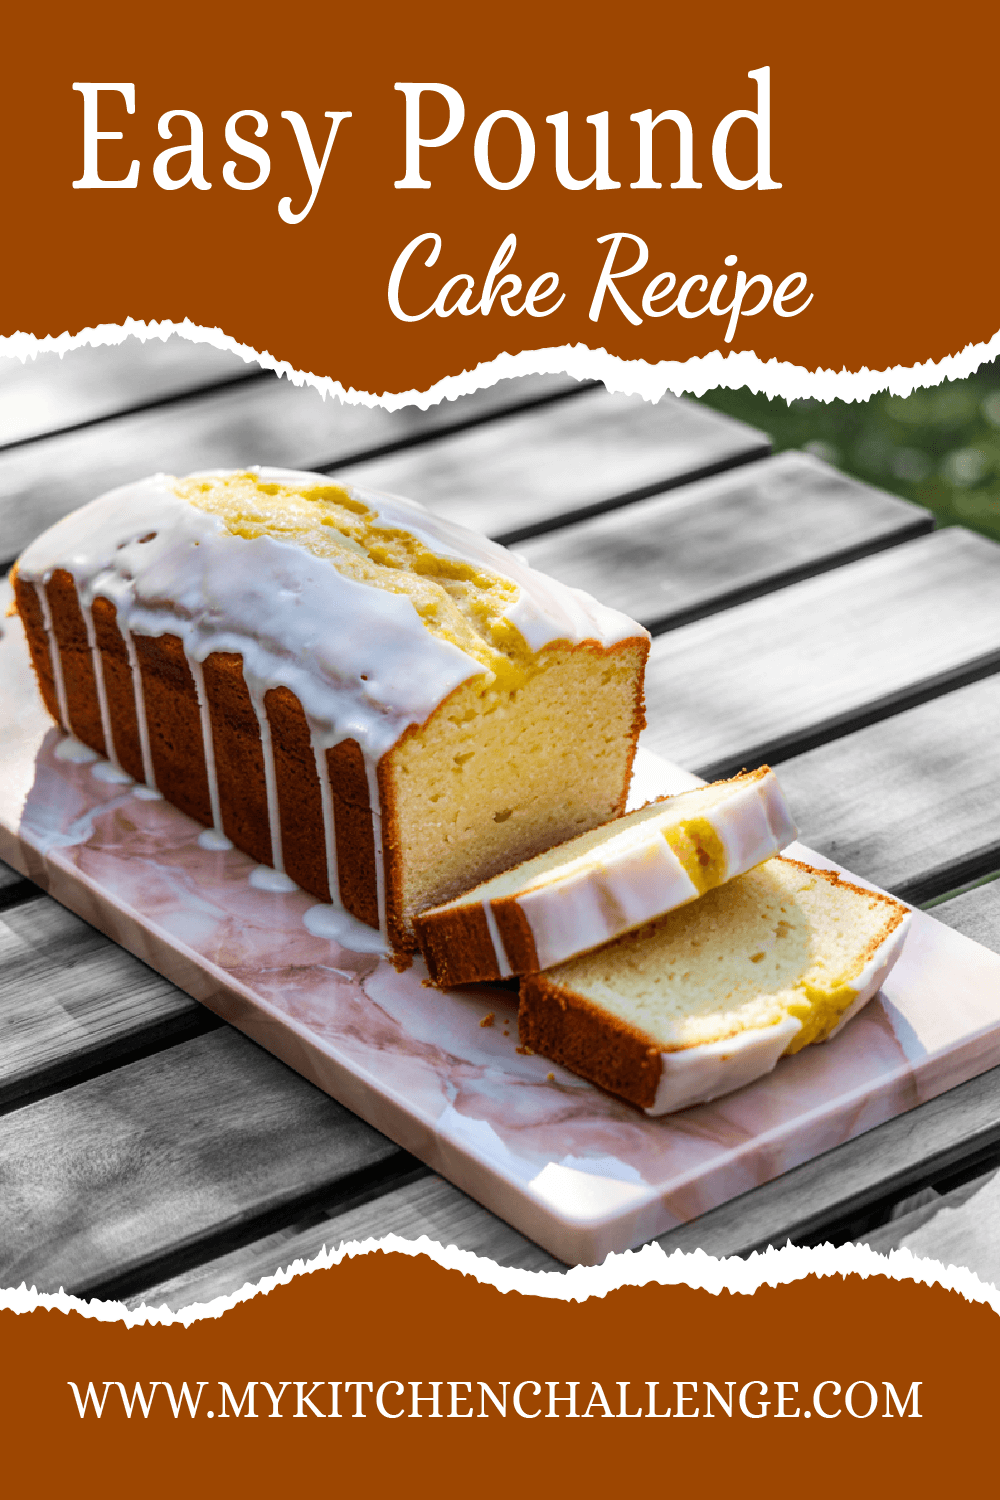
Buttery Perfection: Classic Pound Cake Recipes
I have a confession: I used to think pound cake was boring. Like, “Why would anyone eat this dry brick of sugar when chocolate cake exists?” kind of boring. But then, one random Saturday, I made a pound cake from scratch just to kill time. And wow. One bite and I was officially converted.
It was buttery. Dense but tender. Sweet, but not too sweet. The kind of cake that doesn’t need frosting to show off. And now? I’m obsessed. I’ve baked my way through a dozen versions and finally cracked the code to the perfect pound cake. So, if you want something that’s classic, comforting, and way more versatile than you think, you’re in the right place.
Recipe Snapshot:
| Yield | 1 standard loaf (10 slices) |
| Serving Size | 1 slice |
| Prep Time | 20 minutes |
| Cook Time | 1 hour 15 minutes |
| Total Time | 1 hour 35 minutes |
| Calories per Serving | ~380 |
| Primary Cooking Method | Baking |
| Cooling Time | 2 hours |
| Occasion | Everyday treat, Holiday dessert |
| Diet Type | Vegetarian |
Calories are approximate and may vary depending on exact ingredients used.
Pound Cake Recipes
Course: DessertCuisine: FrenchDifficulty: EasyServings
1
slicePrep time
20
minutesCooking time
1
hour15
minutesCalories
380
kcalWhen you hear “pound cake,” you might think of something your grandma brought to every family picnic. But hear me out—this isn’t your dry, old-school slab. We’re talking lush, velvety pound cake that melts in your mouth and makes you feel like you’re biting into a buttery hug.
This recipe ditches the old pound-of-everything formula and tweaks things just enough to keep the classic vibes while making it even better. No dry crumbs here, friend.
Ingredients
- For the Pound Cake:
1 cup (226g) unsalted butter, softened (room temp)
1 1/2 cups (300g) granulated sugar
4 large eggs, room temperature
2 tsp pure vanilla extract
1/2 cup (120ml) whole milk, room temperature
1/2 cup (120ml) sour cream, room temperature
2 cups (250g) all-purpose flour
1/2 tsp baking powder
1/4 tsp salt
- Optional Glaze:
1 cup (120g) powdered sugar
2–3 tbsp milk or lemon juice
Directions
- Prepare the Equipment and Ingredients
Grease a 9×5-inch loaf pan with butter or non-stick spray and line it with parchment paper. This ensures an easy release. Preheat your oven to 325°F (163°C) and make sure your ingredients (butter, eggs, milk, and sour cream) are all at room temperature. Room temp ingredients blend better and help create a uniform texture. - Cream the Butter and Sugar
In a large bowl or stand mixer, beat the softened butter on medium speed until it’s creamy and smooth—about 1 minute. Then gradually add the sugar and continue beating for 4–5 minutes. You’re looking for a pale, fluffy texture that signals enough air has been incorporated. - Incorporate Eggs
Crack in the eggs one at a time. Mix each egg thoroughly before adding the next. This helps emulsify the batter and prevents curdling. Scrape down the sides of the bowl between each addition. - Blend in the Wet Ingredients
Add the vanilla extract, then pour in the milk and sour cream. Start mixing on low speed. It’s normal if the batter looks slightly broken at this stage—it’ll smooth out once you add the dry ingredients. - Sift and Mix the Dry Ingredients
In a separate bowl, whisk together the flour, baking powder, and salt. Slowly add these dry ingredients to your wet mixture, a little at a time. Use a rubber spatula or the mixer on low speed to combine. Mix just until no flour streaks remain—overmixing will toughen your cake. - Pour Batter and Level
Pour the batter into your prepared pan and use a spatula to smooth the top. Tap the pan a couple of times on the counter to release any trapped air bubbles. - Bake to Perfection
Place the pan in the center of your preheated oven. Bake for 75 to 85 minutes. Check for doneness by inserting a toothpick into the center—it should come out clean or with just a few moist crumbs. The top should be golden brown and cracked (that’s a good sign!). - Cool the Cake
Allow the cake to cool in the pan for 15 minutes. Then, gently lift it out using the parchment paper and transfer it to a wire rack. Let it cool completely—at least 2 hours—before adding glaze or slicing. This waiting period helps the texture firm up and makes cutting easier. - Optional Glaze
Whisk powdered sugar with your choice of milk or lemon juice until smooth and pourable. Drizzle over the fully cooled cake and let it set for 10–15 minutes before serving.
Extra Tips: Little Secrets for Big Success
- Always use room temperature ingredients—this helps them blend more evenly and gives the cake that luxurious crumb.
- Don’t skip the parchment paper lining; it makes removing the loaf from the pan so much easier and cleaner.
- If your cake starts browning too fast, loosely tent it with foil around the 45-minute mark.
- Want an even more decadent twist? Add a teaspoon of almond extract or a handful of chocolate chips.
- Letting the cake rest overnight wrapped tightly enhances both flavor and moisture—trust the process!
Tools of the Trade: Must-Have Equipment
- 9×5-inch loaf pan
- Stand mixer or hand mixer
- Mixing bowls (large and medium)
- Rubber spatula
- Wire cooling rack
- Whisk
- Measuring cups and spoons
- Parchment paper
Substitution Options: How to Make It Work for You
Got dietary needs or just out of something? Don’t worry—this pound cake can flex a little.
Butter: You can swap in margarine or a dairy-free butter alternative, but make sure it’s one made for baking (not a spread). Keep it at room temp for that dreamy texture.
Sour Cream: Greek yogurt works well and gives a slightly tangier taste. For a dairy-free version, use a plant-based yogurt with similar thickness.
Milk: Almond milk, oat milk, or soy milk can be used. Just avoid flavored varieties unless you want vanilla-almond pound cake.
Eggs: Use flax eggs (1 tbsp ground flax + 3 tbsp water per egg) or a commercial egg replacer. It won’t rise quite the same, but it’ll still be tasty.
Flour: Gluten-free all-purpose blends work if you’re avoiding wheat—just make sure your mix has xanthan gum or similar for structure.
Make-Ahead Tips: Prep It Like a Pro
Pound cake is actually one of those rare desserts that gets better with time. If you’re planning ahead, bake the cake a day in advance and let it cool completely before wrapping it tightly in plastic wrap. Store it at room temperature for up to 2 days before serving.
You can also refrigerate it for up to 5 days, but make sure it’s in an airtight container to prevent it from drying out. If you’re glazing, wait until just before serving so it stays fresh and glossy. The flavor deepens as it sits, and the texture becomes even more moist—trust me, it’s worth the wait.
Storage Instructions: Keep It Fresh Longer
To keep your pound cake tasting fresh, store it in an airtight container at room temperature for up to 3 days. For longer storage, wrap it tightly in plastic wrap followed by aluminum foil and place it in the fridge. It’ll stay good for up to 5–6 days. Planning ahead?
This cake freezes beautifully. Slice it first for easier thawing, wrap individual slices in plastic, then freeze in a zip-top bag. When you’re ready to enjoy, let a slice come to room temperature or give it a short zap in the microwave to bring back that just-baked magic.
FAQ Section: Troubleshooting and Customizing Your Pound Cake
Can I make this pound cake in a bundt pan?
Yes! Just make sure to grease and flour the bundt pan thoroughly. The bake time will be slightly shorter—start checking at the 60-minute mark.
Why did my pound cake sink in the middle?
Usually, this happens if the cake was underbaked or the batter was overmixed. Make sure your oven is properly preheated and always test with a toothpick.
Can I reduce the sugar?
A slight reduction is okay (try 1/4 cup less), but going too far will affect texture and moisture. Pound cake relies on sugar for structure.
Can I add flavors like lemon or almond?
Totally! Add 1–2 teaspoons of lemon or almond extract in place of or along with the vanilla. You can even fold in citrus zest.
How do I know when it’s done?
A toothpick inserted into the center should come out clean or with just a few moist crumbs. The top will also be golden with a lovely crack running down the middle.
Food Safety Notes: Handle with Care
When baking with eggs and dairy, food safety is key. Always use fresh, unexpired ingredients and make sure eggs are not cracked or leaking. Keep dairy products refrigerated until just before use. Once the cake is baked, let it cool completely before storing to avoid condensation buildup, which can lead to spoilage.
If storing leftovers, always wrap tightly and refrigerate after two days at room temperature. And when reheating slices from the fridge or freezer, only warm what you need to prevent repeated temperature fluctuations.
Nutritional Information: What’s in Each Slice
Each slice of this buttery pound cake (based on 10 servings) provides approximately:
- Calories: 380
- Fat: 20g
- Saturated Fat: 12g
- Cholesterol: 115mg
- Sodium: 150mg
- Carbohydrates: 43g
- Sugar: 25g
- Protein: 5g
These values are estimates and may vary based on specific ingredients and serving sizes used.
Final Thoughts: The Only Pound Cake Recipe You’ll Ever Need
If you’ve never been wowed by a pound cake before, this one’s here to change that. It’s cozy, dependable, and downright impressive for something with no frosting or fancy frills.
Whether you serve it with berries, a drizzle of glaze, or just on its own with your coffee, this cake delivers every single time.
So go ahead—bake it once, and you’ll understand why I’ve been hooked ever since that accidental Saturday baking session. This pound cake isn’t just a recipe. It’s a ritual.