The Best Fluffy Pancakes recipe you will fall in love with. Full of tips and tricks to help you make the best pancakes.
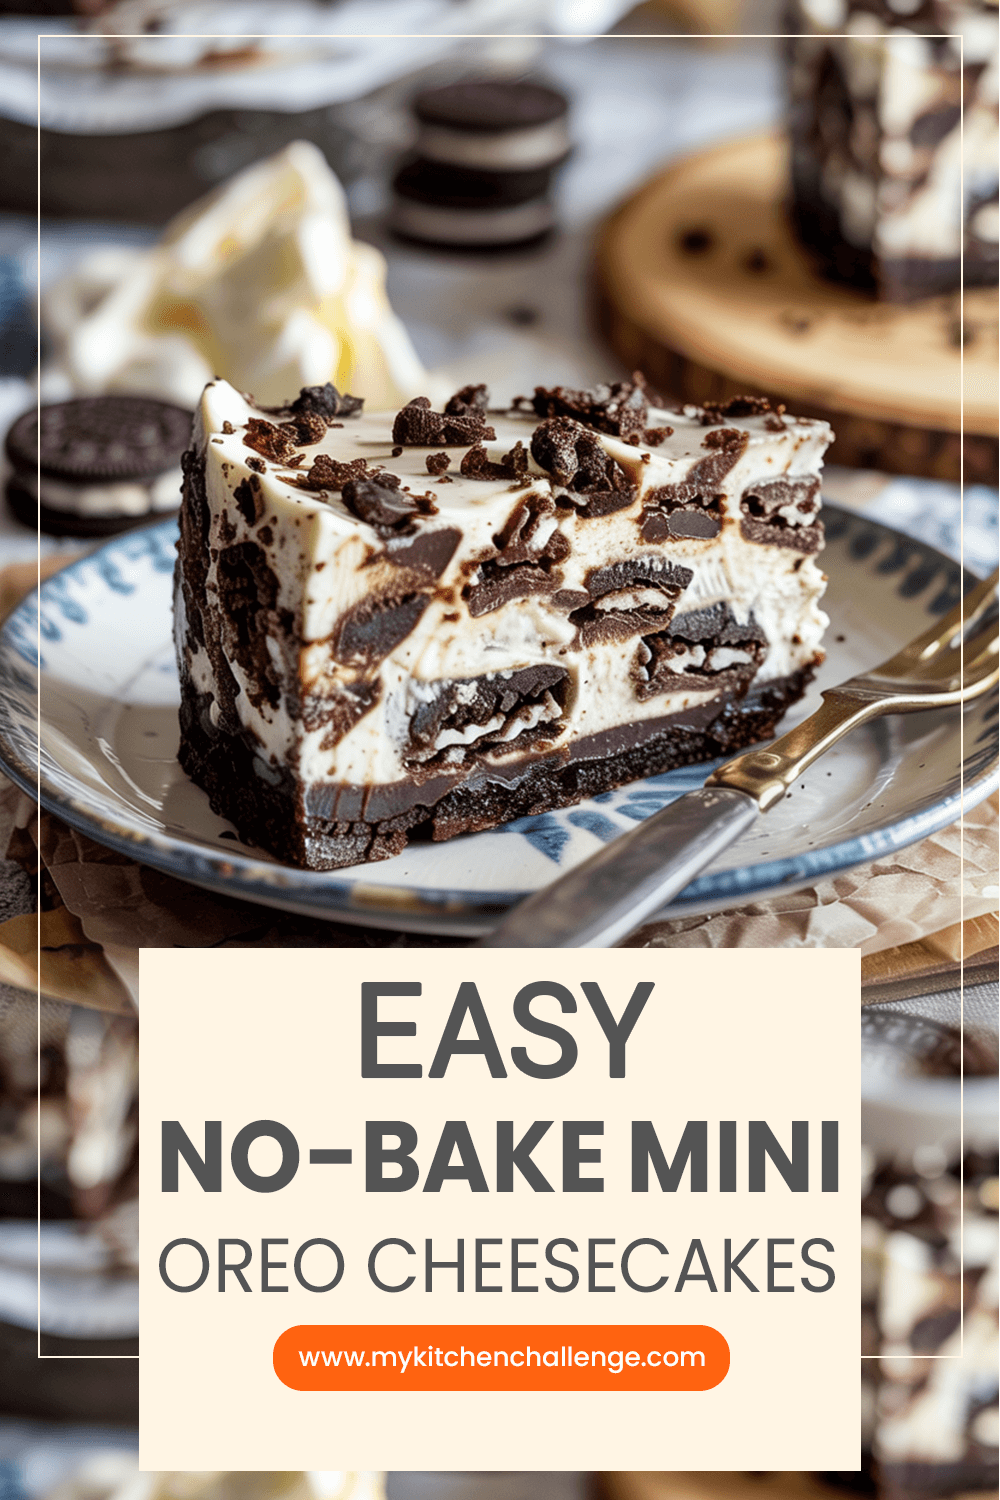
No Bake Oreo Cheesecake: A Dreamy Dessert Without the Oven
If you crave something sweet but don’t want to turn on the oven, nothing hits the spot like a No Bake Oreo Cheesecake. It’s rich, creamy, loaded with crunchy cookie pieces, and irresistibly good.
The best part? You can whip it up with minimal effort and just a few simple ingredients. It’s the kind of dessert that makes you look like a pro in the kitchen without breaking a sweat.
I still remember the first time I made this cheesecake for a family gathering. Everyone thought it took hours to prepare. Little did they know, it was probably the easiest dessert I had ever made! Let me show you exactly how you can create this Oreo magic too.
Recipe Snapshot
| Category | Details |
| Yield | 1 cheesecake (9-inch) |
| Serving Size | 1 slice |
| Prep Time | 25 minutes |
| Make Time | 6 hours (chilling) |
| Total Time | 6 hours 25 minutes |
| Calories per Serving | 450–480 |
| Primary Cooking Method | No-Bake |
| Cooling Time | 6 hours (chill until firm) |
| Occasion | Birthdays, Potlucks, Family Gatherings |
| Diet Type | Vegetarian-Friendly |
Calories are approximate and may vary depending on exact ingredients used.
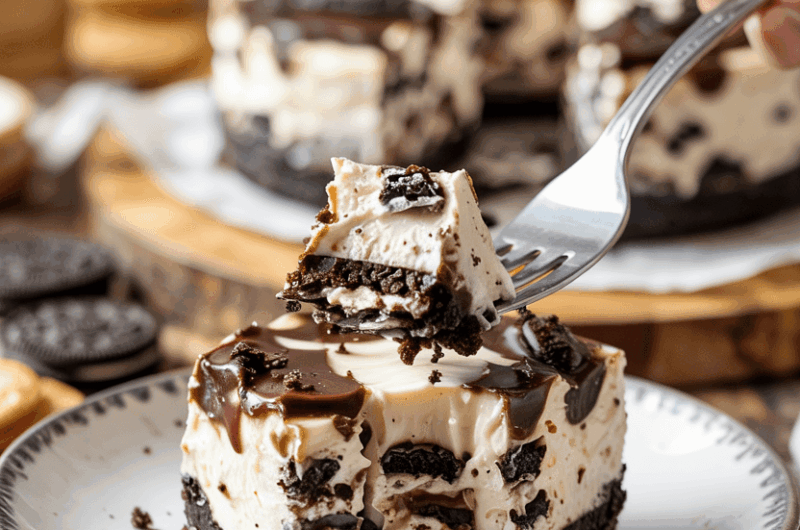
No Bake Oreo Cheesecake
Course: DessertsCuisine: AmericanDifficulty: MediumServings
12
servingsPrep Time
25
minutesCooking Time
5
hours59
minutesCalories
450
kcalNo Bake Oreo Cheesecake is a luscious dessert where crushed Oreo cookies are folded into a silky cream cheese filling atop a buttery Oreo crust—all without baking. It’s the perfect treat for any occasion, from birthdays to casual weekend cravings.
This easy recipe captures everything you love about Oreos, but in a rich and creamy form that feels like a special occasion every time you slice it.
Ingredients
24 Oreo cookies (plus extra for topping)
5 tablespoons butter, melted
16 oz (2 blocks) cream cheese, softened
1 cup powdered sugar
2 teaspoons vanilla extract
2 cups heavy whipping cream
Pinch of salt
How to Make No Bake Oreo Cheesecake
- Prepare the Oreo Crust
Start with the base because it needs time to firm up.
Crush 24 Oreo cookies into fine crumbs using a food processor. Pour in melted butter and pulse a few more times until the crumbs look like wet sand. Press this mixture firmly into the bottom of a 9-inch springform pan.
Use the back of a spoon or the bottom of a glass to pack it tightly. Place it in the freezer while you prepare the filling. - Whip the Cream
A fluffy filling makes all the difference in texture.
In a large mixing bowl, whip the heavy cream until stiff peaks form. You can use a hand mixer or stand mixer for this. Be patient—it takes a few minutes but results in a light, airy cheesecake. - Beat the Cream Cheese Mixture
The heart of every cheesecake is silky cream cheese.
In another bowl, beat the softened cream cheese, powdered sugar, vanilla extract, and a pinch of salt until smooth and creamy. Make sure there are no lumps, scraping down the sides of the bowl as needed. - Fold the Mixtures Together
Bringing everything together the right way keeps it fluffy.
Gently fold the whipped cream into the cream cheese mixture. Use a rubber spatula and fold carefully—do not stir aggressively, or you’ll lose the airiness. Then, chop about 8–10 Oreos roughly and gently fold them into the mixture. - Assemble and Chill
Now it’s time to build your cheesecake!
Pour the filling over the chilled Oreo crust, smoothing the top with a spatula. For extra Oreo goodness, sprinkle more crushed Oreos on top. Cover with plastic wrap and refrigerate for at least 6 hours, or preferably overnight, to set properly.
Equipment You’ll Need
Gathering your equipment first makes everything smoother. Here’s what you’ll need:
- Food processor or blender
- 9-inch springform pan
- Hand mixer or stand mixer
- Rubber spatula
- Mixing bowls
- Measuring cups and spoons
- Offset spatula (optional but helpful for smoothing the top)
Substitutions and Dietary Swaps
If you need to tweak the recipe, it’s totally doable!
- Gluten-Free Option: Use gluten-free chocolate sandwich cookies instead of regular Oreos.
- Lower Sugar Option: Reduce the powdered sugar to ¾ cup if you want it less sweet.
- Dairy-Free Version: Use dairy-free cream cheese, coconut whipped topping, and vegan butter.
Make-Ahead Tips for Busy Days
Planning ahead makes this dessert even more convenient.
- You can prepare the cheesecake up to 2 days in advance. Keep it chilled until ready to serve.
- You can also prepare the crust and the filling separately and assemble it just a few hours before you need it.
- Freeze leftovers for up to 1 month. Just thaw overnight in the fridge before serving.
Storage Instructions
Keep your cheesecake fresh and delicious by storing it properly.
- Fridge: Store in an airtight container or cover the springform pan with foil. It stays good for up to 5 days.
- Freezer: Wrap slices individually in plastic wrap, then place them in freezer bags.
Tip: Always let frozen cheesecake thaw overnight in the fridge for the best texture.
Extra Tips for Perfect Results
Want to make your No Bake Oreo Cheesecake even better? Try these pro tips:
- Room Temperature Cream Cheese: Always use room-temperature cream cheese to avoid lumps.
- Firm Whipped Cream: Make sure your whipped cream forms stiff peaks so the filling sets nicely.
- Freeze the Crust: Chilling the crust while making the filling keeps the base firm and crunchy.
- Decorate Before Serving: For a fresher look, sprinkle extra Oreo crumbs or pipe whipped cream rosettes right before serving.
Frequently Asked Questions
Q: Can I use Cool Whip instead of whipping cream?
Yes! Substitute 2 cups of Cool Whip for the homemade whipped cream if you want to save a little time.
Q: My cheesecake didn’t set properly. What went wrong?
Usually, it’s because the whipped cream wasn’t whipped enough or the cheesecake didn’t chill long enough. Make sure to chill it for at least 6 hours.
Q: Can I add other flavors?
Absolutely! A little mint extract, peanut butter, or even a swirl of chocolate sauce would be amazing.
Q: Can I make it in a pie pan instead of a springform pan?
Yes, you can. Just know that slicing and serving might be a little messier without the removable sides.
Ingredient Selection Tips
Choosing the right ingredients makes all the difference.
- Oreos: Regular Oreos work best. Double Stuf adds too much cream and can make the crust soggy.
- Cream Cheese: Use full-fat cream cheese for the creamiest texture. Avoid whipped or spreadable versions.
- Heavy Cream: Look for heavy cream with at least 36% fat content for the best whipped texture.
Serving Suggestions
There are so many fun ways to serve this beauty!
- Top with Whipped Cream: Pipe a few rosettes of whipped cream for a fancier look.
- Drizzle Chocolate Sauce: Add a chocolate drizzle across the top before serving.
- Add Fresh Berries: Strawberries and Oreos are a match made in heaven.
Final Words
There’s something so satisfying about a dessert that’s easy, creamy, and full of chocolatey goodness—and this No Bake Oreo Cheesecake checks every box. Whether it’s a celebration or just a weekend treat, this recipe will make everyone smile.
Give it a try, and you’ll see how quickly it disappears from the table!