The Best Fluffy Pancakes recipe you will fall in love with. Full of tips and tricks to help you make the best pancakes.
Raspberry Muffins That’ll Make You Forget Store-Bought Ever Existed
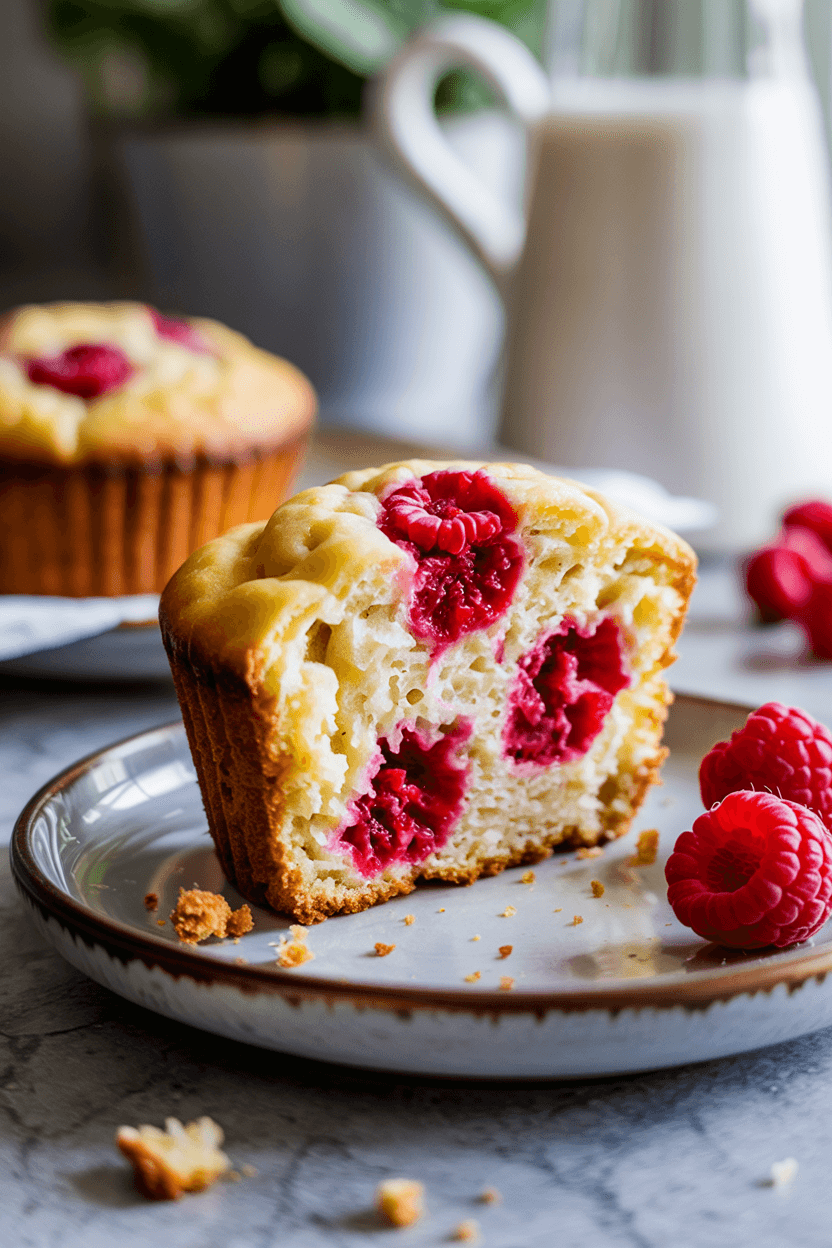
There’s just something magical about homemade muffins—especially the raspberry kind. I mean, who needs a boxed mix when you’ve got plump, juicy berries and a kitchen that smells like a bakery explosion?
The moment those berries burst in the oven and the tops turn golden, it’s pure serotonin. And don’t even get me started on that first bite—tangy, sweet, soft in the middle, and just the right amount of golden crisp on the edges.
These raspberry muffins are exactly what you need when you’re craving a feel-good bake. Whether it’s for breakfast, a late-night snack, or that weird 3 p.m. slump when coffee alone isn’t cutting it—these hit the spot.
You’re about to bake muffins that might just ruin you for the store-bought kind forever.
Recipe Snapshot
| Category | Details |
| Yield | 12 standard muffins |
| Serving Size | 1 muffin |
| Prep Time | 15 minutes |
| Bake Time | 18–22 minutes |
| Total Time | 35–40 minutes |
| Calories per Serving | ~210 |
| Primary Cooking Method | Baking |
| Cooling Time | 10 minutes |
| Occasion | Breakfast, Snack, Brunch |
| Diet Type | Vegetarian |
Calories are approximate and may vary depending on exact ingredients used.

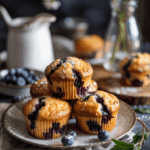
Raspberry Muffins
Course: Breakfast, DessertCuisine: AmericanDifficulty: EasyServings
1
muffinPrep time
15
minutesBake Time
18
minutesCalories
210
kcalSure, muffins might be cupcakes in their yoga pants—but these raspberry ones? They’re on a whole different vibe. Not too sweet, definitely not dry, and packed with juicy pops of raspberry that make every bite feel like you’re winning at breakfast.
What really sets them apart is that golden top with just a whisper of crunch, hugging a soft, fluffy interior that’s got enough tang to keep things interesting.
Whether you’re chasing that cozy café energy or just trying to impress your brunch crowd, these muffins deliver big flavor without the sugar crash. Wholesome never tasted so indulgent.
Ingredients
2 cups (250g) all-purpose flour
2 tsp baking powder
1/2 tsp baking soda
1/4 tsp salt
1/2 cup (100g) granulated sugar
1/4 cup (60ml) vegetable oil or melted coconut oil
1/4 cup (60g) plain Greek yogurt or sour cream
2 large eggs
1/2 cup (120ml) milk (any kind)
1 tsp pure vanilla extract
1 tbsp lemon zest (optional, but chef’s kiss)
1 1/2 cups fresh or frozen raspberries (don’t thaw if frozen)
2 tbsp turbinado sugar (for sprinkling)
Directions
- Preheat Your Oven
Start by preheating your oven to 400°F (200°C). This higher temperature at the beginning of the bake is essential—it gives your muffins that fast initial rise and the perfect golden dome. Give your oven plenty of time to fully reach the set temperature before you pop in the muffins. - Prepare Your Muffin Tin
Line a standard 12-cup muffin tin with paper liners or grease the cups with butter or non-stick spray. Paper liners make cleanup easy, but a well-greased tin works just as well if you’re in a pinch. - Mix the Dry Ingredients
In a large mixing bowl, whisk together the flour, baking powder, baking soda, salt, and sugar. Give it a good whisk to evenly distribute the rising agents and break up any flour clumps. This ensures your muffins rise evenly and taste consistent throughout. - Combine the Wet Ingredients
In a separate bowl or large liquid measuring jug, crack in the eggs and beat them lightly. Add the milk, oil, Greek yogurt, vanilla extract, and lemon zest. Whisk it all together until it’s smooth and slightly frothy. The yogurt adds moisture and a subtle tang that pairs perfectly with the berries. - Mix the Batter Carefully
Pour the wet mixture into the bowl of dry ingredients. Using a spatula or wooden spoon, gently fold the ingredients together. Don’t whisk or beat the batter—it should be just combined. A few lumps are totally fine. Overmixing here leads to tough muffins. - Fold in the Raspberries
If you’re using frozen raspberries, toss them in a tablespoon of flour first—this keeps them from bleeding too much and sinking to the bottom. Gently fold the raspberries into the batter, turning slowly to avoid crushing them too much. You want whole berries in every bite. - Fill the Muffin Cups
Spoon the batter into your prepared muffin cups, filling each one about 3/4 of the way full. This gives them room to rise without spilling over. If you’re a precision baker, that’s roughly 1/4 to 1/3 cup of batter per muffin. - Add the Crunch (Optional but Recommended)
Sprinkle each muffin top with a bit of turbinado sugar. It gives them a gorgeous, crackly golden top that adds both texture and a subtle sweetness. - Bake with a Temperature Drop
Place your muffin tin on the center rack of the oven. Bake at 400°F (200°C) for the first 5 minutes to get that lift, then reduce the temperature to 350°F (175°C) and bake for another 13–17 minutes. Don’t open the oven door during the first 10 minutes—it messes with the rise. - Check for Doneness
The muffins are done when a toothpick inserted into the center comes out with a few moist crumbs (not wet batter). The tops should be golden and springy to the touch. - Cool Before You Snack
Let the muffins cool in the pan for about 5–10 minutes—this helps them finish setting. Then transfer to a wire rack to cool completely. Or just let them sit long enough that you don’t scorch your mouth. We’ve all been there.
Extra Tips
- For bakery-style muffins with those iconic high domes, make sure your batter is thick and not overly wet—this helps them rise instead of spread.
- Always start with a blast of high heat in the oven (400°F) for five minutes, then reduce to 350°F for the remainder of the bake. This initial heat creates steam, lifting the muffin tops before they set.
- Avoid overmixing the batter. As soon as the flour disappears, stop. Overmixing develops gluten, which leads to dense muffins instead of light and fluffy ones.
- If you’re using frozen raspberries, don’t thaw them—they hold their shape better and won’t bleed into the batter. Tossing them with a little flour keeps them evenly distributed.
- Let the muffins sit in the tin for just 5–10 minutes after baking, then transfer them to a cooling rack. Leaving them in the tin too long traps steam and can make the bottoms soggy.
Equipment List
- 12-cup muffin tin
- Mixing bowls (at least two)
- Measuring cups and spoons
- Whisk
- Spatula
- Zester or fine grater (if using lemon zest)
- Wire cooling rack
Substitution Options
If you’re working with dietary restrictions or just missing an ingredient, don’t worry—there’s wiggle room. You can swap up to half of the all-purpose flour with whole wheat flour to sneak in some extra fiber and a subtle nutty taste, though going full whole wheat might weigh things down a bit. If you’re gluten-free, a good 1:1 gluten-free flour blend with xanthan gum will keep the texture nice and fluffy.
Need a different sweetener? Coconut sugar or maple sugar give a caramel-like twist and can be used one-for-one with granulated sugar. Liquid sweeteners like honey or maple syrup also work, just reduce the milk slightly to account for the extra moisture—about 1/3 cup syrup for every 1/2 cup sugar.
Out of oil or want something lighter? Melted butter will give you richer flavor, while swapping half the oil with applesauce cuts back on fat without compromising the crumb. Any type of milk—dairy or non-dairy—does the job, and if you’re out of Greek yogurt or sour cream, coconut yogurt or a thick plant-based alternative fits in seamlessly.
Eggs can be replaced with flax eggs (1 tablespoon ground flaxseed + 3 tablespoons water per egg, let it sit to gel) or even 1/4 cup of mashed banana or applesauce per egg, though the flavor will lean sweeter and more banana-forward.
As for the berries, if raspberries aren’t your thing or you’re out, blueberries, blackberries, chopped strawberries, or even diced peaches or mango bring their own vibe. It’s a flexible recipe—you do you.
Make-Ahead Tips
These raspberry muffins are a dream to prep in advance, whether you’re gearing up for a brunch spread or just want something ready for those chaotic weekday mornings. You can make the batter the night before—just cover it tightly and refrigerate. It’ll thicken slightly, which actually helps those muffin tops rise taller and stay fluffy. Let it sit at room temp for about 10–15 minutes before baking.
Already baked them? No problem. Once completely cool, muffins can be stored in an airtight container at room temperature for up to 2 days. Want to keep them fresher longer? Pop them in the fridge for up to 5 days or freeze them individually wrapped for up to 2 months. Just thaw overnight or microwave for 15–30 seconds to bring back that soft, warm magic.
Storage Instructions
Once the muffins have cooled completely, you’ve got a few storage options depending on how fast you plan to eat them. For short-term storage, place them in an airtight container at room temperature for up to 2 days. If you want them to last a little longer, move them to the fridge where they’ll keep for 3 to 5 days. To freeze, lay the muffins out on a tray and freeze until solid—this prevents them from sticking together. Then transfer to a freezer bag or airtight container, squeeze out as much air as possible, and freeze for up to 2–3 months. When you’re ready to eat, thaw them overnight in the fridge, let them come to room temperature, or warm them up in the microwave in 15-second bursts until soft and steamy again.
Nutritional Information
Here’s a rough nutritional breakdown for one standard-sized raspberry muffin (based on a 12-muffin yield):
- Calories: 210kcal
- Carbohydrates: 40 g
- Protein: 4 g
- Fat: 12 g
- Cholesterol: 45 mg
- Sodium: 212 mg
- Fiber: 2 g
- Sugar: 22 g
- Vitamin A: 220 IU
- Vitamin C: 4 mg
- Calcium: 70 mg
- Iron: 1 mg
These values are estimates and can vary based on specific brands and substitutions used.
FAQ
Can I use frozen raspberries instead of fresh?
Absolutely. They’re actually great for baking because they don’t bleed as much into the batter. Just keep them frozen—no need to thaw—before folding them into your mix.
Can I substitute raspberries with other fruits?
Yes, you can swap them with blueberries, chopped strawberries, or even dried cranberries. Just keep in mind the flavor will shift. For dried fruits, use less—around 75g to 100g—and consider adding a bit more moisture.
Can I make these gluten-free?
Definitely. Replace the flour with a gluten-free blend and be sure your baking powder is gluten-free too. Some users suggest also checking your vanilla extract or paste to be safe.
Do I need to thaw frozen raspberries?
Nope! Add them straight from the freezer to keep them from bleeding and turning your batter pink.
Can I skip the yogurt or use something else?
You’ll need a substitute for moisture—sour cream or a thick plant-based yogurt works well. Creme fraiche can be used too, though it’s richer and might require a splash of extra milk.
Can I freeze these muffins?
Yes, and they freeze beautifully. Cool completely, freeze on a tray, then transfer to a bag or container. They’ll keep for up to 3 months.
Why does my muffin batter look like cake batter?
That’s totally normal. It’s a rich, thick batter that sits between cake and muffin in texture. Trust the process—it bakes up light and fluffy.
Do these work with dark chocolate instead of white?
Yes! Dark chocolate pairs just as nicely with raspberries. Feel free to adjust to your taste.
Final Thoughts
If you’ve made it this far, you’re clearly someone who appreciates the simple, cozy magic of a good muffin. These raspberry muffins aren’t just delicious—they’re dependable, flexible, and practically foolproof.
Whether you’re baking with kids, using up extra berries, or just craving something bakery-quality without leaving your house, this recipe delivers every single time. Once you try them, don’t be surprised if they become your go-to. Because really, who wouldn’t want a freezer full of happiness just one reheat away?