The Best Fluffy Pancakes recipe you will fall in love with. Full of tips and tricks to help you make the best pancakes.
Dessert Charcuterie Board: A Beautiful, Sweet Spread for Every Occasion
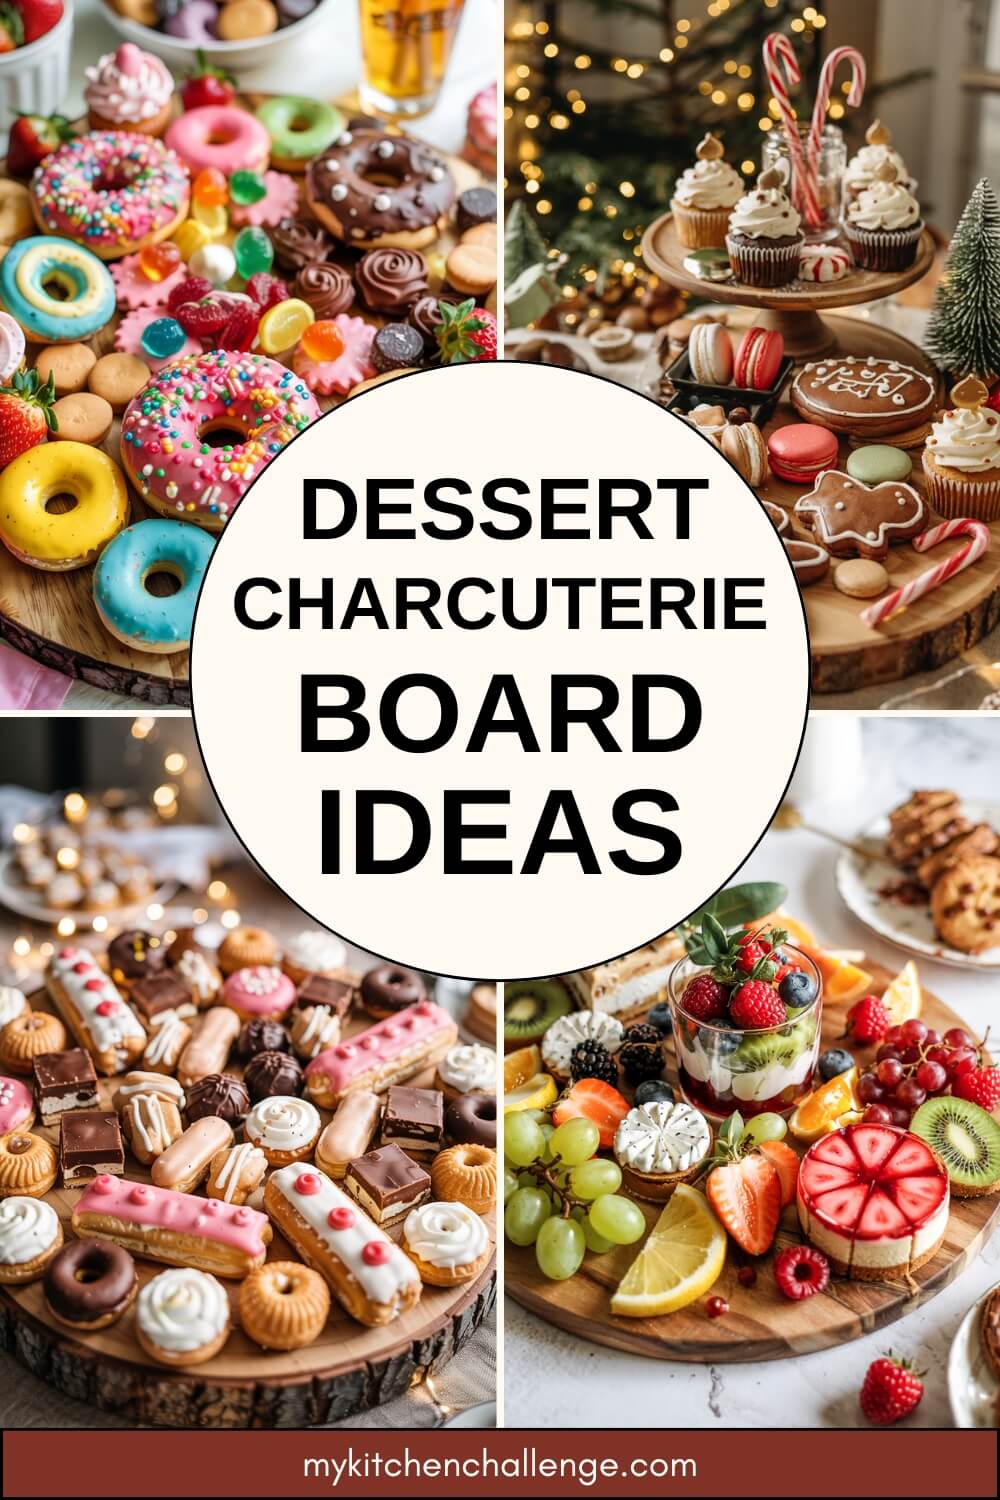
There’s something magical about a dessert charcuterie board. It takes the charm of a traditional cheese board and swaps in a dazzling mix of chocolates, fruits, cookies, and dips. It’s the kind of centerpiece that makes people gather, smile, and indulge—no knives or formality required.
When I first started making dessert boards, it wasn’t about perfection. It was about bringing joy to a table, creating a little world of sweet bites that felt like a celebration, even on a regular weekday.
It’s fun, it’s customizable, and it always gets people talking. Whether it’s Valentine’s Day, a birthday, a brunch with friends, or just a Friday night in, this is the kind of easy, no-bake treat that never goes out of style.
Ready to make your own show-stopping dessert board? Here’s everything you need to know.
Recipe Snapshot
| Category | Details |
| Yield | 1 large board |
| Serving Size | N/A (grazing format) |
| Prep Time | 20 minutes |
| Make Time | N/A |
| Total Time | 20 minutes |
| Calories per Serving | Varies |
| Primary Cooking Method | No-Cook |
| Occasion | Birthdays, Holidays, Brunches |
| Diet Type | Customizable |
Calories are approximate and depend on ingredient selection.
Dessert Charcuterie Board
Course: DessertsCuisine: AmericanDifficulty: Easy8
servings20
minutes30
minutes50
minutesA dessert charcuterie board is a curated arrangement of sweet treats beautifully laid out on a platter or board. It blends flavors, textures, colors, and shapes to create a feast for the eyes and the palate. Think bite-sized pastries, candies, fruits, and dips—all arranged for easy, joyful grazing.
Ingredients
- Base Items (Larger treats):
Mini cupcakes or brownies
Cookies (chocolate chip, macarons, shortbread)
Donut holes
Biscotti or wafers
Chocolate-covered pretzels
- Fruits (Fresh and Dried):
Strawberries, raspberries, blueberries
Apple slices or orange wedges
Dried apricots, banana chips, cranberries
- Candies & Chocolates:
Chocolate truffles or bonbons
Gummy bears or sour strips
Candy canes (for holiday boards)
White, dark, or milk chocolate bark
- Dips and Spreads:
Nutella or chocolate ganache
Marshmallow fluff
Peanut butter or cookie butter
Whipped cream or flavored yogurt
- Garnishes (optional but pretty):
Edible flowers
Crushed nuts
Mini marshmallows
Powdered sugar dusting
Directions
- Choose Your Theme or Color Palette Before you begin, decide if your board has a seasonal or holiday vibe (e.g., Christmas, Valentine’s Day) or a color theme (like pastel or chocolate-only). This helps narrow down your ingredient list.
- Place the Bowls First Start by placing small bowls of dips or loose candies on your board. Space them out evenly to create a visual structure.
- Add the Bigger Items Layer in cookies, cupcakes, donuts, or brownies next. Place them in clusters or fan them out like a deck of cards to add shape and flow.
- Fill in with Fruits and Chocolates Tuck fresh berries, sliced fruit, and chocolates into the gaps. Use contrasting colors to create a vibrant look.
- Add the Small Finishing Touches Add candies, dried fruits, and garnishes in the remaining spaces. The idea is to make the board feel full and overflowing.
- Adjust for Balance and Shape Step back and look at the board. Shift any items that feel too clustered or uneven. Keep it casual, not perfect.
Notes
- Pre-wash and dry fruits earlier in the day.
- Make or buy dips ahead of time and store in airtight containers.
- Use store-bought baked goods to save time.
- Assemble the board 1–2 hours ahead, then cover with plastic wrap and refrigerate if needed (avoid this with delicate cookies).
Equipment You’ll Need
Keep things simple. You don’t need anything fancy—just a few essentials:
- Large wooden board or tray (round or rectangular)
- Small bowls or ramekins (for dips)
- Serving tongs or small spoons (optional)
- Small plates and napkins for guests
How to Store Leftovers from Your Dessert Board
Some items will store better than others, but here’s a general guide:
- Fresh fruit: Refrigerate in an airtight container and eat within 1–2 days.
- Cookies and brownies: Store in a container at room temp for up to 4 days.
- Chocolates and candies: Keep in a cool, dry place away from sunlight.
- Dips: Refrigerate and consume within 3 days.
Extra Tips for a Crowd-Pleasing Board
Want to elevate your board from good to unforgettable? Try these small but mighty tricks:
- Balance textures: Mix crunchy (cookies), creamy (dips), chewy (candies), and juicy (fruits).
- Vary heights: Use small jars or ramekins to create visual dimension.
- Use natural elements: Add rosemary sprigs, cinnamon sticks, or dried citrus for rustic flair.
- Label the dips: Especially if you have peanut butter or common allergens.
- Cut fruits right before serving to prevent browning.
Frequently Asked Questions
Q: Can I make a gluten-free dessert charcuterie board?
Yes! Use gluten-free cookies, pretzels, and brownies. Focus on naturally gluten-free fruits, nuts, and candies.
Q: How do I make a vegan dessert board?
Opt for plant-based dips like almond butter or coconut yogurt. Choose dairy-free chocolates and vegan baked goods.
Q: Can I serve a dessert board as the main dessert at a party?
Absolutely! Just scale it up based on the number of guests and keep extra supplies on hand for restocking.
Q: Do I need to refrigerate the board?
Only if you use perishable items like whipped cream or yogurt dips. Most items can sit at room temperature for a few hours.
Ingredient Tips: How to Choose the Best Items
To make the most of your board, choose ingredients that are:
- Fresh: Avoid bruised fruits or stale cookies.
- High contrast: Mix dark and light treats for visual appeal.
- Finger-friendly: Stick to bite-sized or easy-to-hold items.
- Durable: Avoid anything that melts too quickly unless serving immediately.
How to Serve a Dessert Board Beautifully
Presentation matters! Here are a few ways to wow your guests:
- Serve on a wooden or marble board for rustic charm.
- Add candles or fairy lights around the board.
- Use a cake stand to elevate part of the board.
- Provide small plates, forks, and cocktail napkins nearby.
Final Words
A dessert charcuterie board is more than just a sweet treat—it’s a conversation piece, a moment of joy, and a chance to be creative. Whether you’re putting it together in 15 minutes or curating a color-coded masterpiece, the end result is guaranteed to be delicious.
So go ahead. Pull out your favorite treats, arrange them with love, and watch the smiles grow. You don’t need to bake or cook anything to impress—you just need to gather, layer, and serve.


